


Essential Baking Techniques
Baking is a science, and these recipes will help you master it! No matter your skill level or experience, this is your chance to conquer meringue, custards, soufflés, curds, caramel, and more.
You've heard it time and time again: baking is a science. And if these recipes are any indication, that statement holds true! Baking requires precision and patience. It can get messy and things can go wrong, but learning from experience is undeniably an essential part of the process. Whether you're still fairly new to the science of baking or already feel confident in your skills, these recipes will help you conquer some of the techniques that are most integral to making a sturdy meringue, ultra smooth custard, soufflés that stand tall, soft and chewy cookies, lemon curd you'll want to spread on everything, cheesecake without a single crack, and nutty caramel sans scorching.

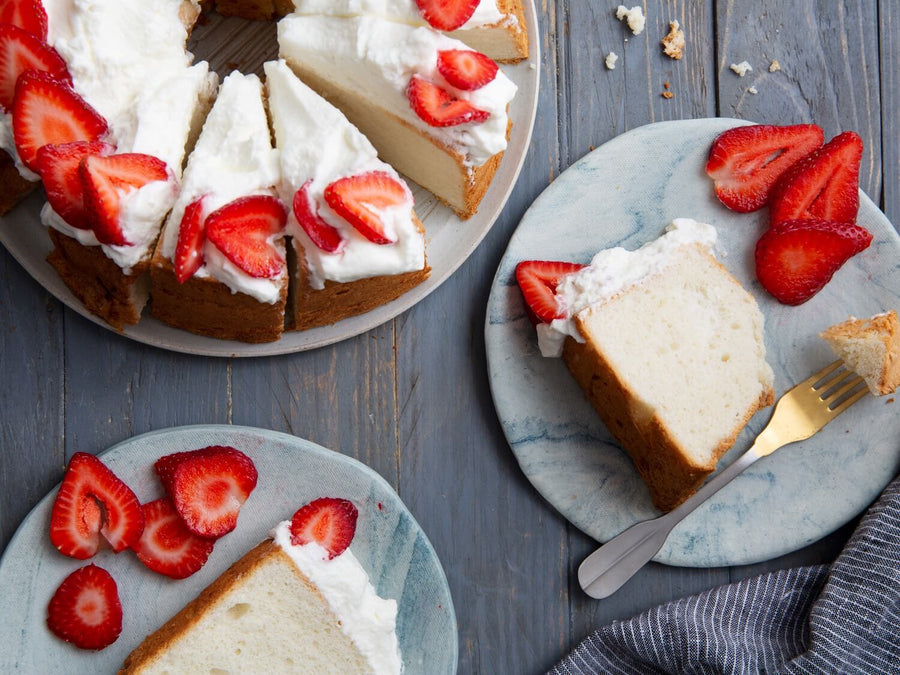
1. Angel Food Cake
Want to make a light-as-air angel food cake that tastes like heaven? First, you'll need to learn how to make a perfect meringue.
Why it's difficult
Meringue can be fussy, sensitive to temperature, and will quickly lose its light and airy structure if handled roughly while you fold in your dry ingredients to create angel food cake batter.
Tips for success
- Use fresh egg whites at room temperature for the loftiest meringue.
- Don’t turn your mixer up to high speed until the whites are opaque and fairly thick; the slower you build up the meringue structure, the more stable it will be when you go to fold in the dry ingredients.
- In addition to soft peaks, look for a glossy appearance as an indicator that your meringue has reached the right consistency (over-whipped meringue will lose that shine).
- To “fold” in your dry ingredients, use a spatula to “cut” into the center of the meringue, then scrape from the bottom of the bowl up the side that’s near you and flip it over onto the top (essentially folding the batter on the bottom of the bowl over on to the top). Repeat, turning the bowl slightly each time until your mixture is smooth and uniform.
- Resist the urge to stir or vigorously mix your whipped meringue with the dry ingredients, as this will beat out the air you worked so hard to trap in there and yield a denser cake.

2. Steamed Custard Buns
Though not technically baked, these steamed custard buns require some essential techniques that most professional pastry chefs know by heart.
Why it's difficult
This recipe calls for a silky smooth custard, which means tempering your eggs to avoid scrambling them—a skill that takes some care. As for the dough, it requires just a few ingredients but can easily be over-mixed.
Tips for success
- If you don’t have a thermometer to check the water temperature for your dough, just go by feel: 100-110F water is noticeably warmer than lukewarm, but you can still comfortably hold your finger in it. If you have any doubts, err on the side of slightly cooler water and just know that your dough may take some extra time to rise.
- Although it will take a few minutes for the dough to reach its smooth, developed texture in a stand mixer, it is possible to over-mix it. You'll know it's been over-mixed if your dough becomes sticky and appears shredded. To avoid this, check your dough often throughout the process and remember that the total kneading time will vary from mixer to mixer.
- Before making the custard, sift the cornstarch, then stir into the other dry custard ingredients until evenly distributed. This will help ensure a smooth, lump-free custard.
- When tempering the egg mixture with the hot milk, slowly add the hot milk while stirring constantly to avoid scrambling the eggs. Remove the pot from the heat when pouring the warmed egg-milk mixture back into the pot.

3. Gingerbread Soufflés
Soufflés may have a reputation for being difficult, but there's no reason to be intimidated! With a few quick tips, you'll be on way to a well-risen soufflé.
Why it's difficult
The trick to any soufflé is getting it to rise up past the sides of the ramekin, a phenomenon caused by the air bubbles in the whipped egg whites expanding as they're heated in the oven. It's a delicate process, but nothing short of magical when done right!
Tips for success
- When heating up the cream, keep it at a simmer as opposed to a full rolling boil to make sure you don’t scorch it or boil off too much water.
- Be aware that the egg and cream mixture will thicken very suddenly on the second round of cooking (seriously, it will happen in the blink of an eye), so stir it constantly and pay close attention to your pot.
- Like any good soufflé, these deflate rapidly when they come out of the oven, so be ready to serve right away!

4. Caramel-Stuffed Chocolate Cookies with Sea Salt
If you're still fairly new to baking but already feel confident in your chocolate chip cookies, try this slightly trickier recipe for chocolate caramel-stuffed cookies with sea salt.
Why it's difficult
Like a lot of cookie doughs, this one is very soft. And while this makes for a deliciously delicate final product, the dough can also be a bit harder to work with.
Tips for success
- The secret to extra soft and delicate cookies is mixing just until the wet and dry ingredients are combined, and no longer. If using an electric mixer, keep it on low speed to avoid developing the gluten in the flour, which will toughen the texture of the final product.
- An ice cream scoop is a great tool for cookie-making. Use it to scoop this soft chocolate cookie dough to get smooth, even balls of dough.
- If you start scooping your cookies and find they are just too sticky to work with, transfer the entire bowl of dough in and out of the fridge as needed to achieve and maintain a workable texture.

5. Creamy Meyer Lemon Curd Tarts
Lemon curd is liquid gold for anyone who loves citrus. Learn how to make it right and you'll want to spread it on English muffins, pipe it into cupcakes, and make these Meyer lemon curd tarts for every person you know.
Why it's difficult
As curds go, this one isn't particularly hard to make, but there's one problem that many beginner bakers often run into: curdling. Since tempering is involved in the process, there's always a risk of ending up with bits of cooked egg in your final product—and no one wants lumpy lemon curd in their tart!
Tips for success
- No food processor? No problem! Whisk together all the dry ingredients for the crust until well combined, then use your fingers to rub the butter into the dry ingredients until you have a bowl of uniform crumbs. Next, add water, 1 tablespoon at a time, stirring until the dough comes together. This may take a few minutes when done by hand.
- When lining your tart shells, break up the dough, sprinkling small chunks evenly across the bottom and a little extra on the sides (reserving a few tablespoons of crumbs in your bowl). Then, use your fingers to press the crumbs into an even layer, and if you find you have a thin spot or hole, simply patch it up with some of the reserved crumbs.
- When heating your curd, it’s very easy to scorch the eggs. To avoid this, stir constantly yet slowly, scraping the entire bottom of the pot well as you stir. Keep the heat very low.
- To speed up the cooling of your finished lemon curd, you can carefully stir it to release the steam while it sits in the ice bath. In addition, replace the ice cubes as they melt.

6. Pumpkin Cheesecake with Maple and Bourbon
If you're a fan of cheesecake, trying your hand at homemade is so worth the slow bake, all the time it takes to cool, and the hours of chilling.
Why it's difficult
Along with taking a good chunk of time to make, a cheesecake like this one has to be watched carefully. There are a few things that can go wrong, but cracks are the most common issue. Luckily, if you do end up with an unsightly fracture across the top of your cheesecake, you can easily cover it up with a sour cream topping.
Tips for success
- Press your crust crumbs at least 1” or more up the sides of the springform pan to even out the overall thickness of the crust and allow for an easy un-panning later.
- It’s very important that your cream cheese is at room temperature if you want a super smooth cheesecake batter. If your cream cheese isn't quite at room temperature or if you keep your house on the colder side, you can cube your cream cheese, place it on a plate, and microwave it for 20-30 seconds until it has the consistency of soft, spreadable butter.
- This recipe is a little bit unique in the world of cheesecakes in that you aren’t using visual indicators, but simply time to determine whether your cheesecake is fully baked. Although it’s tempting to open the oven after the initial bake time to check it out, resist! As long as your oven temperatures are where they're supposed to be, you’ll be rewarded with a beautiful cheesecake after that hour of rest time in the oven, which is meant to allow the residual heat to continue cooking the batter. If you open the door at any point after turning the oven off, the heat will escape and you may end up with an underdone cheesecake.
- When baking the sour cream toppingi t’s the same deal! Don’t worry about checking the jiggle of the filling or taking a quick peek inside the oven.
7. Classic Leche Flan With Vanilla Bean
Flan has many iterations, but at its core, it's a sweet custard baked atop a caramel sauce, then inverted before serving.
Why it's difficult
To make caramel without burning or scorching it, you really have to get to know your visual cues. For most people, this means learning from experience and making a few mistakes here and there. But have no fear! Once you know what to look for in your pot of bubbling sugar syrup, you're on your way to making a wonderfully nutty caramel for your flan.
Tips for success
- During the first few steps of making caramel, it's so tempting to stir the sugar syrup. Resist! If you stir before the sugar has completely dissolved, you can seed crystallization, which causes some of the sugar that did dissolve to turn back into hard crystals. It's very difficult to come back from this stage.
- When getting your pot ready, put the water in first and the sugar second. This will deter the sugar from getting stuck to the bottom of the pot. If you have a saucepan small enough that it can be covered with just the 3 tablespoons of water that the recipe calls for, that’s ideal.
- If this is your first time making caramel, keep your heat on medium-low throughout the full cook time. Although it will take significantly longer for the sugar to caramelize, it’ll help to prevent hot spots and burning.
- When the whole pot has reached the proper level of caramelization, you will notice a uniform amber color, and a faint smoke will rise from the entire surface of the caramel. These visual cues mean that you’re ready to remove the caramel from the heat.
- The caramel will begin to set quickly once it’s off the heat, so be sure to have your cake pan, llaneras, or ramekins prepared and nearby before you start cooking the caramel.
- When combining the ingredients for the custard, it’s best to mix by hand. Using an electric hand mixer or stand mixer will introduce too much extra air into your custard, which may lead to bubbles in the final product.
- Do you really need the water bath around the pan? Yes! The water bath creates a much less harsh cooking environment for the flan by insulating the pan. This facilitates a slow bake to yield a smooth texture, and most importantly, prevents overbaking and cracking of the custard by adding some humidity to the harsh, dry heat in the oven.